Glasurit’s RATIO SCAN II is a spectrophotometer that complements existing color-matching systems. The Glasurit Profit Manager is used to integrate the spectrophotometer into the color-matching processes for the automotive refinishing segment.
MOVIES
RATIO SCAN II
RATIO SCAN II WITH COLOR TOOL CENTER
RATIO SCAN II & CPS
RATIO SCAN II & CPS WITH COLOR TOOL CENTER
INTRODUCTION
For efficient and effective automotive refinishing, finding the right color is essential.
Over the years, the range of colors has grown by leaps and bounds (wider range of models, extended range of colors including, metallic, pearl, multilayer and individual colors), which has led to an ever-increasing demand for improved color-matching systems and techniques.
Tried and tested color-identification and color-matching systems (“color-matching tools”) have been on the market since the 1990s. The current trend on the market involves the introduction of electronic color-matching tools based on devices known as spectrophotometers. Glasurit introduced the spectrophotometers to complement existing systems, on the one hand, and replace existing physical systems, on the other. The spectrophotometers close some gaps and offer quicker and more precise color matching.
ADVANTAGES
Easy
To use the spectrophotometer, you need to have only basic technical and color-related skills.
Automation or digitalization
The spectrophotometer offers process automation and simplified support. (Updates)
Precise
The spectrophotometer allows you to find the right color quickly.
Complete
The spectrophotometer provides you access to the complete Glasurit color database.
RATIO SCAN II spectrophotometer
PREVIOUS MODULES
BASIC KNOWLEDGE COLOR
COLOR PHYSICS
THE RATIO SCAN II SPECTROPHOTOMETER
A spectrophotometer may be compared to a digital camera. It measures the intensity of the light reflected from the surface wavelength by wavelength. The measurement is taken for several viewing angles. The measured values are then analyzed by the Profit Manager. To reproduce the measured color, a visualization of the formula is displayed as a suggestion for both the colors of the Glasurit database and for the customer’s sprayout read by the device.
Since the spectrophotometer reads the light reflected from the surface, the surface has to be in good condition. Surface defects such as scratches and other damage can and will lead to incorrect or inaccurate measurements. The spectrophotometer takes multiple measurements. In most cases, three measurements are enough if the surface quality is good. Depending on the condition of the surface, up to 12 measurements can be taken, however. The goal is to determine a good, reliable average that can serve as the basis for the subsequent suggestion.
BRIEF DESCRIPTION OF THE RATIO SCAN II SPECTROPHOTOMETER
- On/off power button
- Positioning LED‘s
- Measurement button (non-functional)
- Color display
- Navigation button (up, down, left and right) and main selection button
- USB Input
- AC adapter input
- Safety strap connection
- Dust cover

Brief description of the RATIO SCAN II spectrophotometer
CALIBRATION
To guarantee accuracy, you must calibrate the spectrophotometer every 24 hours. (Calibration is described in more detail in the user manual for the RATIO SCAN II spectrophotometer).
COLOR-MATCHING PROCESS
The six-step color-matching process with the RATIO SCAN II spectrophotometer.
STEP 1: CLEANING THE AREA OF THE VEHICLE TO BE MEASURED
Prepare the surface you wish to measure.
Before you take the measurement, you must clean the area to be measured in order to remove wax, silicone and other contamination that could affect the measurement.
You should take the measurement as close as possible to the area to be refinished, preferable on an adjacent body part. You must ensure that the device does not measure a body part that previously underwent panel repair whose color does not match the area you wish to repair.
BASIC KNOWLEDGE COLOR
STEP 2: POLISHING THE CLEANED AREA OF THE VEHICLE
After you have cleaned the body part, you must polish it in order to remove fine surface defects that could affect the measurement results. Due to the remaining film of the polish - depending on the color - measuring inaccuracies may occur. For this reason, a further cleaning of the polished surface/ area is always recommended.
SPOT REPAIR POLISHING
STEP 3: USING THE SPECTROPHOTOMETER TO MEASURE THE VEHICLE
Note: You must take color measurements at normal room temperature. Taking measurements outdoors in direct sunlight causes measurements to be incorrect.
Remove the dust cover and position the spectrophotometer on the body part to be measured. Position the device so that the three LED lights turn green. The measurement is automatically started as soon as the LED lights turn green. If you remove the spectrophotometer from the surface or lift it during measurement, a large RED X will appear on the LCD display. This means that the measurement has failed due to an exaggerated movement.

All three LED lights should remain green during measurement
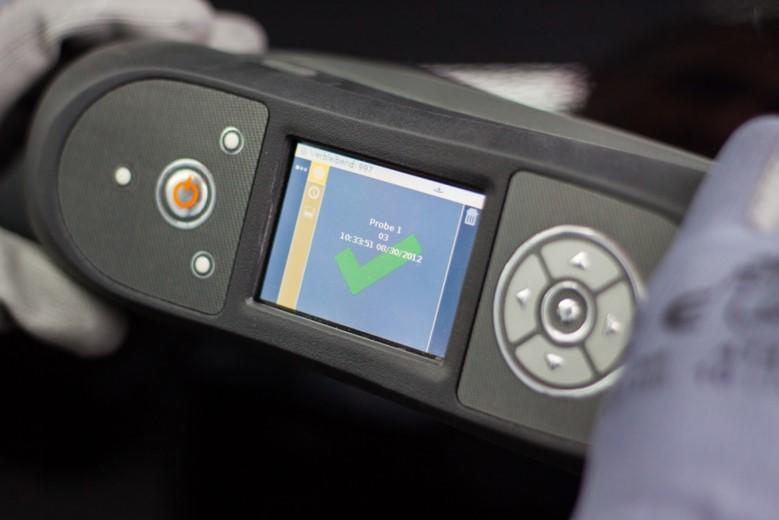
The spectrophotometer will prompt you to take several samples per measurement in order to determine a robust average that can serve as a reference to a mixing formula. As soon as this average is determined, a large green check mark will appear in the device’s display, indicating that enough information is now available to suggest a mixing formula.
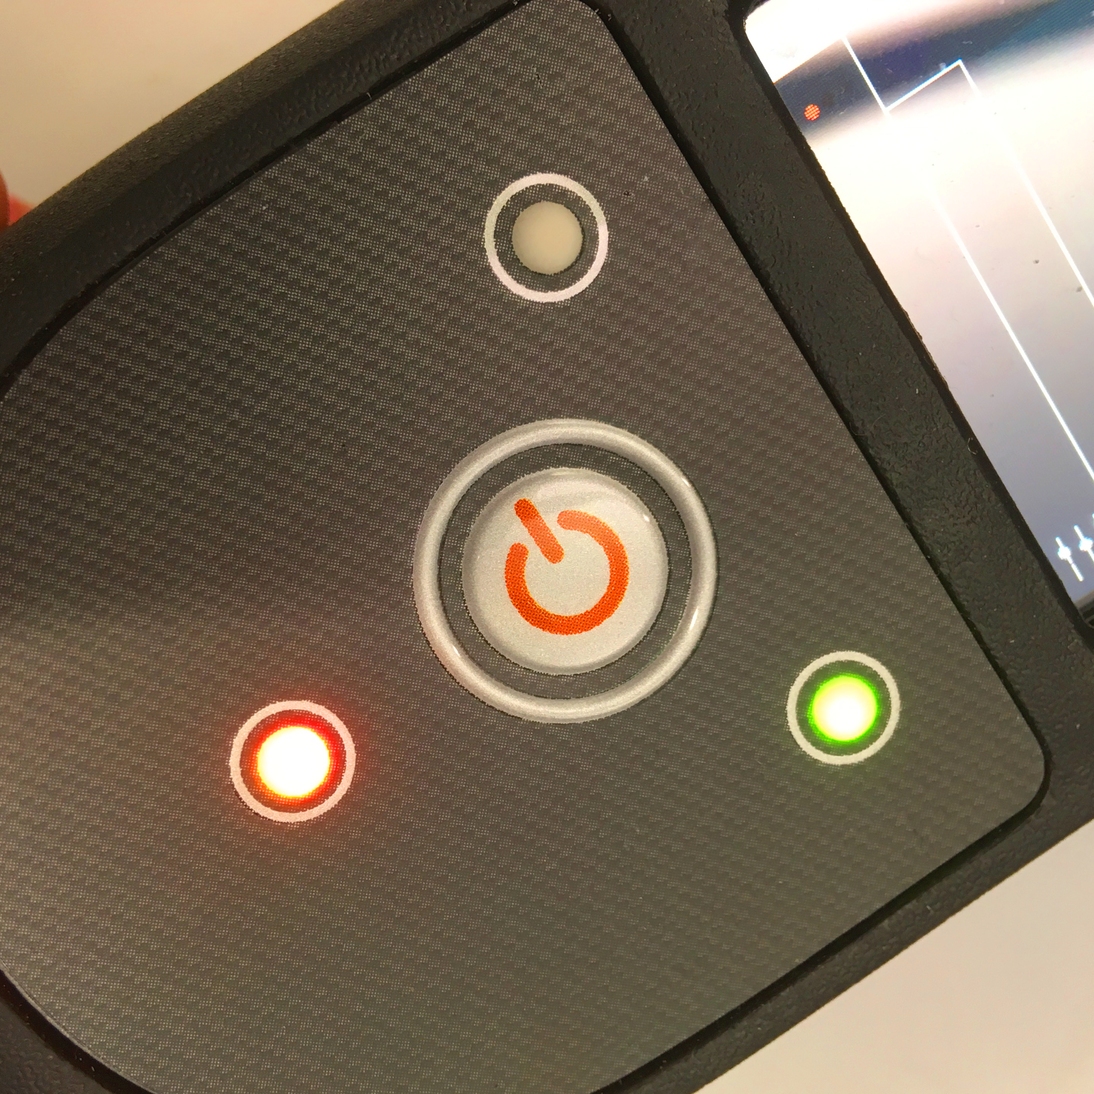
Red light up followed by error message
The spectrophotometer requires multiple measurements. As soon as the measurement is accurate enough, the measurement is completed. You can then measure the color of additional vehicles.
STEP 4: TRANSFERRING ORDERS FROM THE SPECTROPHOTOMETER TO THE RATIO SCAN MODULE
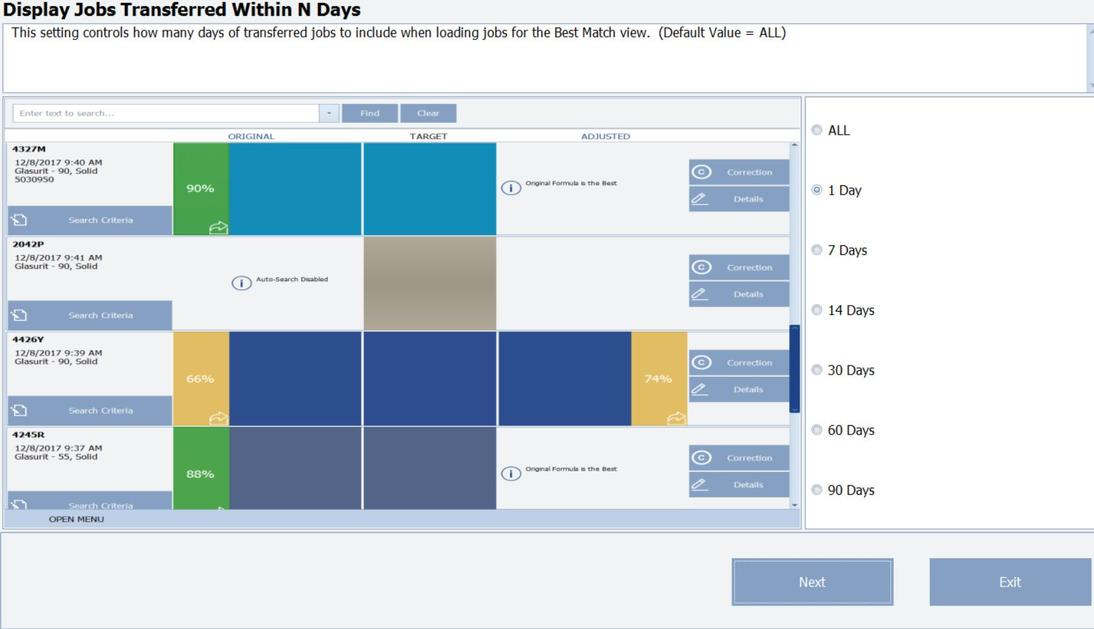
To transfer orders or measurements, connect the spectrophotometer to the computer (using a USB cable or Bluetooth). After the device is connected, the RATIO SCAN module will open (see figure)All of the measurements that have been taken and transferred so far are displayed. Thus, after each adjustment, older measurements will also be displayed (see figure).
|
Selecting the days of the measurements to be displaye |
Profit Manager (RATIO SCAN module) start screen |
 Note: The first time you start the device, the wizard will open. The wizard guides you through all settings.
STEP 5: IMPORTING THE MEASUREMENT INTO THE PROFIT MANAGER SOFTWARE AND PERFORMING A SEARCH FOR A SOLUTION
In order for the Profit Manager Pro to be able to process the data, the measurement values must be transferred from the spectrophotometer to the Profit Manager.
STEP 5.1: DOWNLOADING THE RESULTS INTO THE GLASURIT PROFIT MANAGER
In the RATIO SCAN module, press “OPEN MENU” and select “TRANSFER MEASUREMENTS”. The results of the new measurements are displayed.
Select one, several or all measurements for downloading (see figure).
Display of measurements available on the spectrophotometer
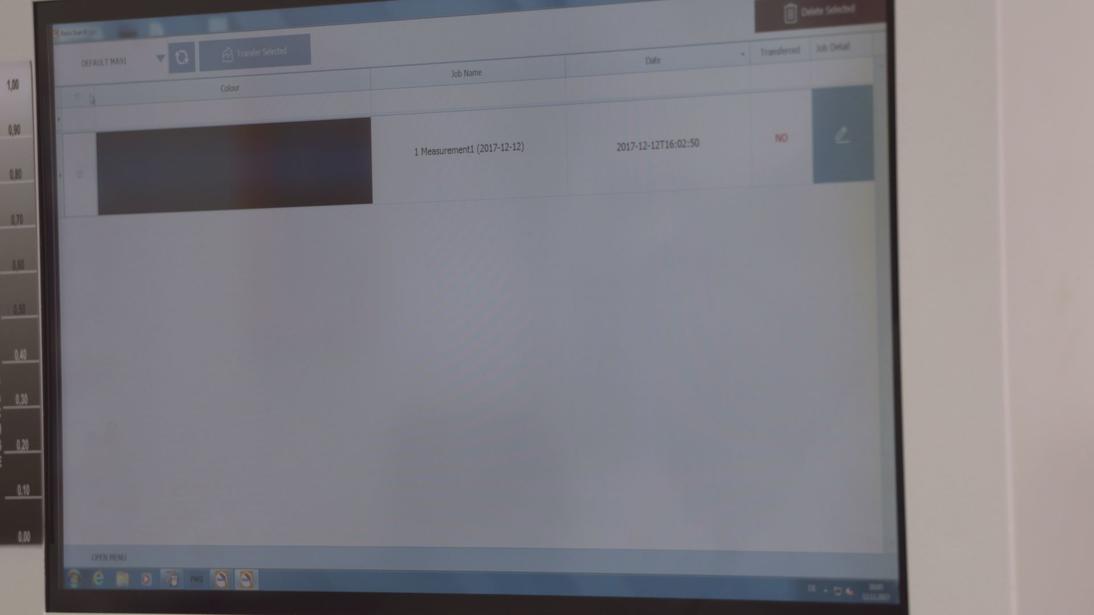
Selection field for measurements to be downloaded
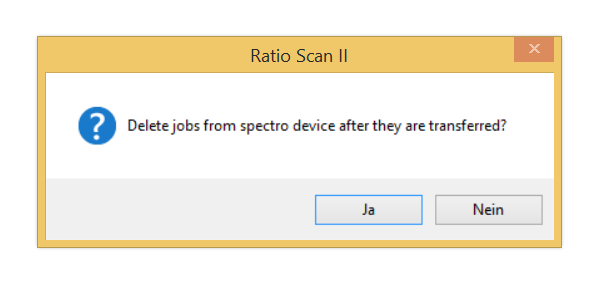
Then press “Transfer selected”. You will be asked whether the measurement should be deleted from the device directly after the download (press Yes or No).
Information about advanced settings and configurations for the spectrophotometer and the ICCM software (see the spectrophotometer and ICCM modules)
PROFIT MANAGER COLOR MANAGEMENT SYSTEM
STEP 6: DISPLAYING THE MEASUREMENT RESULTS/ENTERING THE COLOR DATA
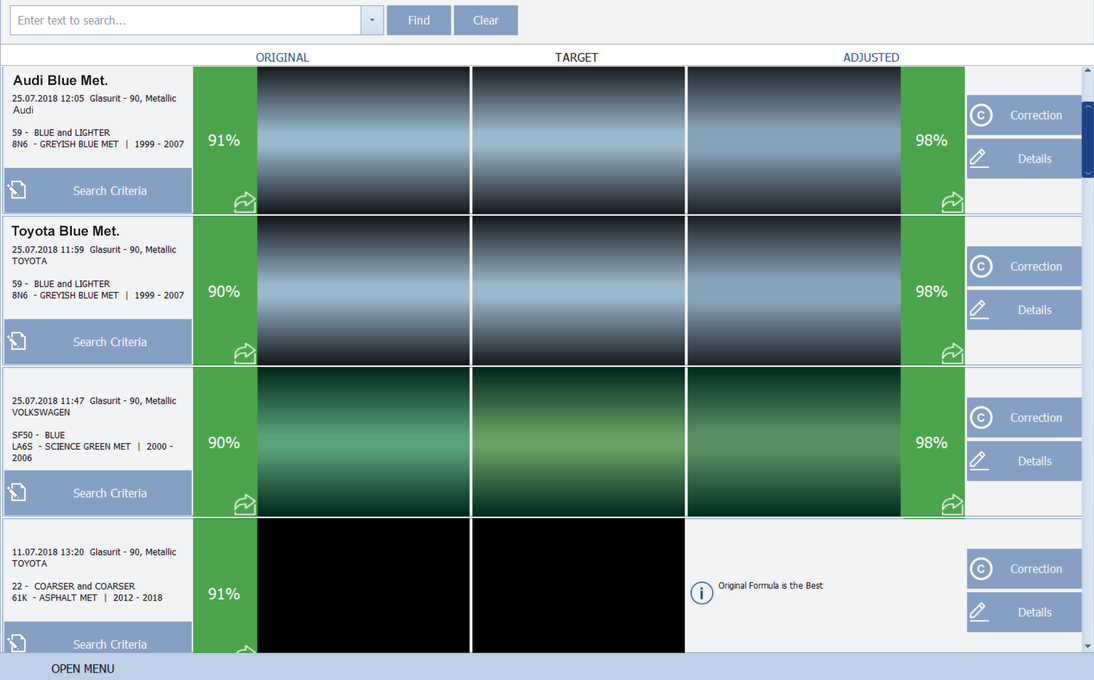
After the measurements have been downloaded, they will all be displayed (in the center of the “Target” column). The left and right columns will still be displayed as empty because the information on the manufacturer is still missing. You must therefore enter the manufacturer for the particular color (“Search criteria” button). Then, for each new measurement, the best-matching color found in the database (designated “Original” color) appears in the left column and if possible, is improved in the right column (designated “Correction”).
Description:
- Center:Target (this is how the measured color looks)
- Left:Original (available solution from the database)
- Right:Correction (corrected option for achieving even better matching with the target measured values)
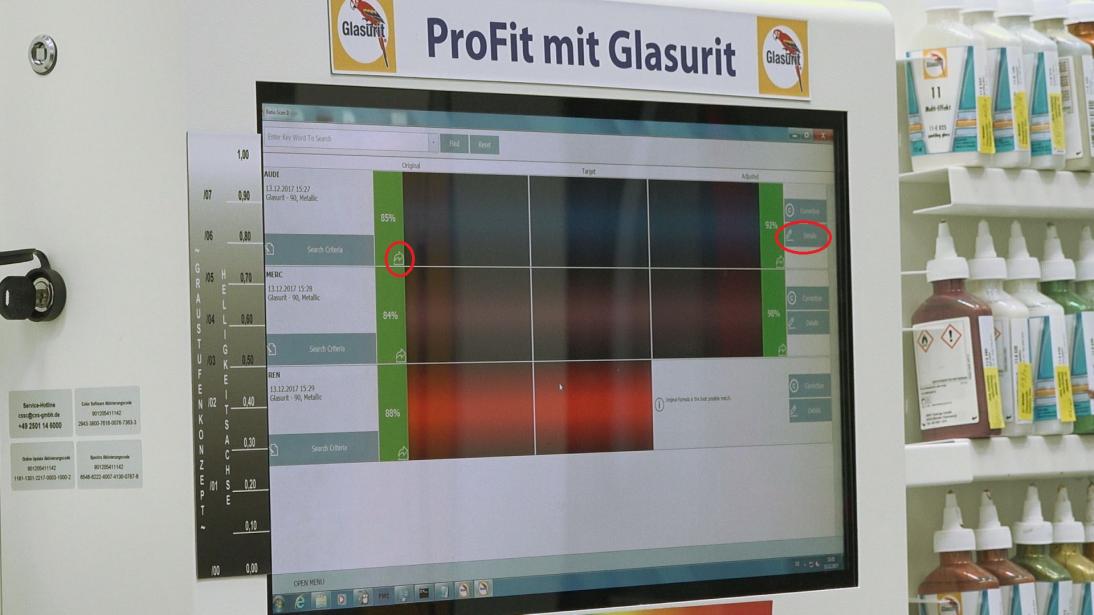
Display of all new measurements and their solutions
STEP 6.1: PERFORMING A SECOND CORRECTION
For this, measure the coated sprayout (first correction option) and transfer it to the software. To establish a reference to the target color, you must link the two measurements. The new “Correction” function on the right side of the display is available for this. You must select this function during the first measurement. A window opens that you can now use to select the second correction. The two measurements are linked and a new correction is displayed.
 First measurement with reference to the correction mixture
 Measured result of the correction mixture
 Click the “Correction” function during the first measurement
 Correction window, selection of the second measurement
 Display of the new screen (correction of the first measurement/target/new correction)
STEP 6.2: SELECTING DISPLAYED SOLUTIONS OR HAVING OPTIONS DISPLAYED
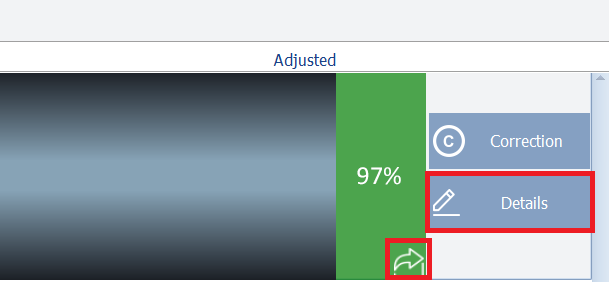
Pressing the arrow or viewing “Details”
Press the arrows (on the display in the color area indicating an index between 0 to 100) to make the system go directly to the weighing-in of material. Alternatively, you can press the “Details” selection button and all of the related options that have been found will be displayed. Here too, you can use the arrows to go directly to the weighing-in of the material and create a sprayout, for example.
The RATIO SCAN module suggests the best solutions with an index of 0-100. The higher the percentage, the higher the matching with the sample measured on the vehicle.
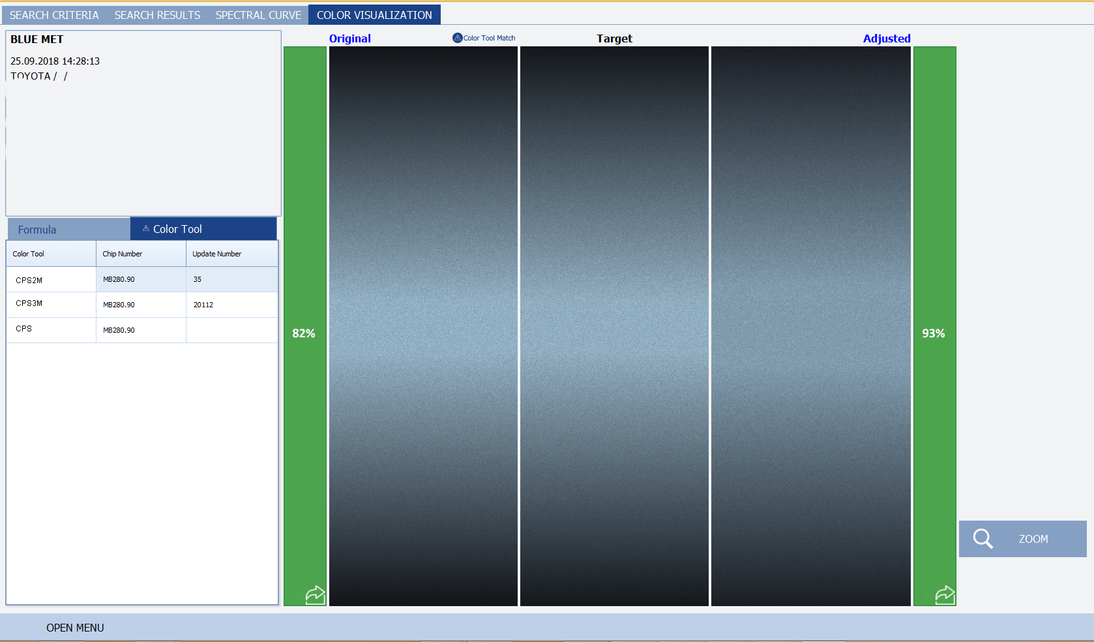
Display of the CPS chips options
In most cases, these solutions have Color Profi System (CPS) chip references that are linked. You can compare the CPS chip with the vehicle in order to verify the accuracy of the match when using 22 Line, 55 Line or 90 Line.
To display the CPS chips options, press “Details” and then “Like Colors”.
In cases in which no CPS chip is recommended, you should prepare a sprayout of the original formula (on the left next to the target specification) or of the automatically performed correction (on the right next to the target specification) in order to verify the accuracy of the match.
Here you will find additional information on creating a sprayout and on comparing the color to the vehicle.
- BASIC KNOWLEDGE COLOR
Here you will find all of the information on color matching using CPS.
- COLOR RETRIEVAL WITH COLOR PROFI SYSTEM (CPS)
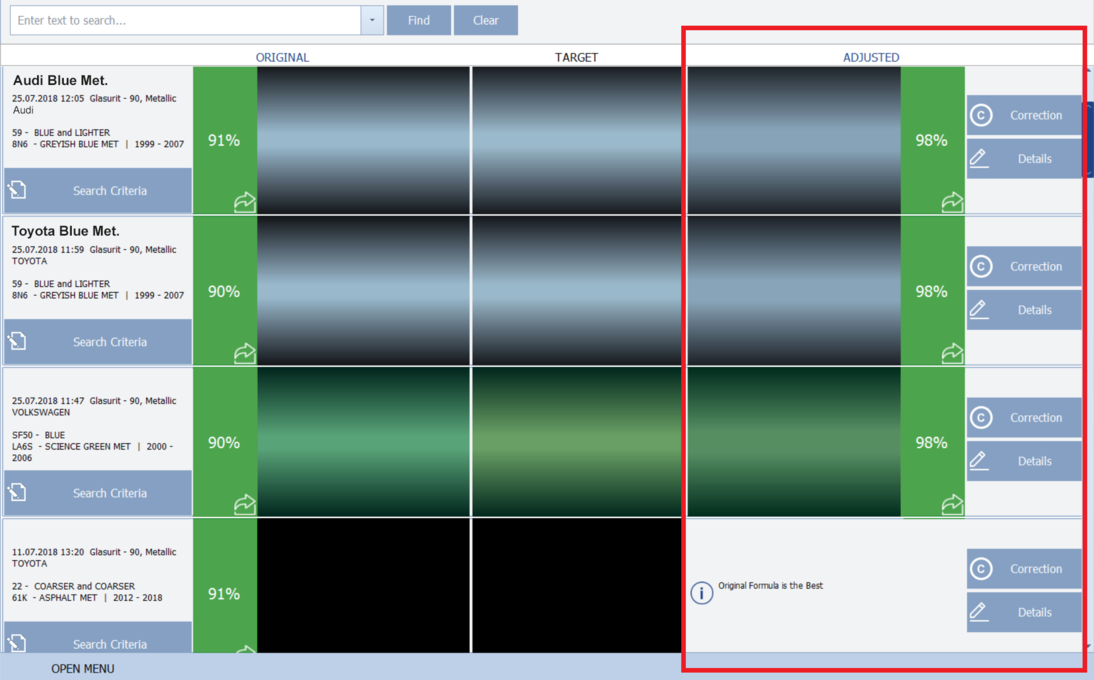
Display of all new measurements and their solutions
Thanks to the effectiveness of the Profit Manager search and the comprehensive database, you may also obtain suggestions that refer to colors of other vehicle manufacturers. This is because the RATIO SCAN module compares the spectral curves of the measurement with the colors available in the entire database and not only with those of the specified manufacturer. It is possible that the suggested solution is better than the standard formula recommended by the car manufacturer.
In most cases, the RATIO SCAN module attempts to reformulate the selected mixing formulas in order to achieve even better matching with the measured values.

