 0002 GRAPHICS FOR TRANSLATION
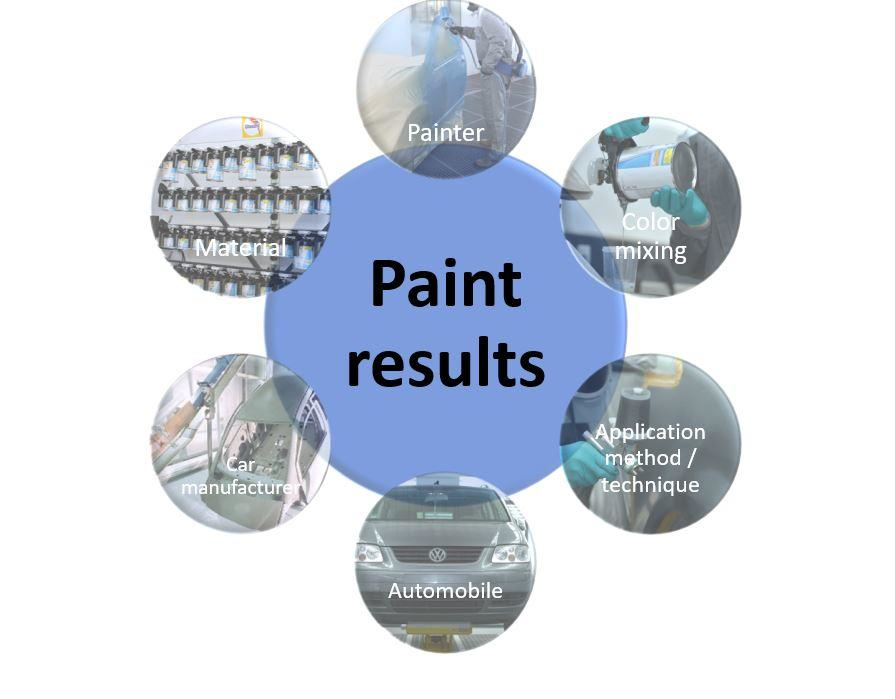
You will obtain basic knowledge about separate working steps required for color reproduction, starting with influencing factors up to the creation of spray-outs. In addition, you will be introduced to various tools for color assessment.
MOVIES
MIXING ON A SCALE
90 LINE 2 STAGE SPRAYOUT SAMPLE
90 LINE 3 STAGE SPRAYOUT SAMPLE (TRANSLUCENT RED)
90 LINE 3 STAGE SPRAYOUT SAMPLE (WHITE PEARL)
90 LINE 4 STAGE SPRAYOUT SAMPLE
PREVIOUS MODULES
-
BASIC KNOWLEDGE BODYSHOP EQUIPMENT
-
BASIC KNOWLEDGE PREPARATION - FILLER GREY SHADE CONCEPT
-
COLOR PHYSICS
WHEN SHOULD YOU PERFORM COLOR RETRIEVAL?
We recommend that you perform color retrieval as early as possible.
This offers several benefits:
- can be included in the damage estimate
- allows best-suited grey shade to be identified in time and applied in the repair process
- avoids troubleshooting when under time pressure during the repair process.
FACTORS INFLUENCING COLOR DURING THE REPAIR PROCESS
When comparing color samples, various parameters that could influence the color must be considered.
Factors influencing color include the following:
Factors influencing the color process
OEM color differences/variants
The actual color of a specific color code has certain variants. There are various reasons for these variants
- Paint repair during production
- Different paint batches
- Different production plants or paintlines
- Different paint suppliers
Environmental factors (UV radiation, aging, etc.)
Even if weather resistance is guaranteed, color variations due to the aging process can still occur.
Lighting conditions
Lighting conditions (bright daylight, to yellow bulb) can cause a single panel to appear to have different colors or decrease/increase the difference in color between two samples.
Previous repairs
The goal/challenge of refinishing a vehicle involves creating an invisible repair. In many cases, performing a blend-in repair is more efficient than carrying out intensive color matching. For the blend-in repair, the color of a repair solution and the original paintwork could be different, even if you are unable to detect this visually.
Application
Application can have an impact on the color. For example, for effect pigments, application can easily affect the pigments' alignment in the layer, which influences the flop effect of the color (for further explanation see VIEWING ANGLE).
Lighting conditions (bright daylight, to yellow bulb) can cause a single panel to appear to have different colors or decrease/increase the difference in color between two samples.
A great deal of variation in the material can impact the color:
- Using the wrong reducer or mixing ratio
- Failures during the maintenance of the mixing machine
- Mistakes during the scaling (weighing) process of a mixing formula
- Applying the wrong ground coat
The human factor


Apart from technical factors, the human factor can also influence color evaluation. For example, you may focus your attention very keenly if the repair is for a very important or demanding customer. On the other hand, you may become distracted because you are quite busy or affected by other things that are on your mind.
GOLDEN RULES OF COLOR
To achieve a good color match, you must know how to use the computer scales, mixing machine, spraying techniques and mixing bases correctly.
- Stir mixing bases and factory-packed paint thoroughly by hand before fitting the stirring lid.
- Reserve each stirring lid for one mixing base only.
- Switch on the mixing machine for 10-15 minutes twice a day.
- Check that all stirrers are moving.
- Keep the spout of the lid clean to make exact measuring out of the mixing bases easier.
- Use the lastest color updates.
- Follow the instructions given in the mixing formula exactly, and weigh in precisely.
- Watch for special remarks in the mixing formula, such as remarks concerning variants.
- Make sure to check details supplied on variants. Use variants where appropriate.
- Observe instructions on mixing ratios with corresponding products precisely.
- Use color charts.
- Prior to painting, perform a color check with a spray out card (100 Line, 90 Line, 55 Line, 22 Line) or with a CPS chip (90 Line, 55 Line, 22 Line). After drying, compare it to the vehicle being repaired.
- Be sure to match colors in daylight – in half shade and neutrally colored surroundings.
- Never store mixing bases at extreme temperatures.
- Ensure that the air temperature in the paint mixing room is at least +15°C.
- The mixing machine, the reading device/working station and the spectrophotometer must be kept clean at all times.
- RATIO Scan II must be calibrated every 24 hours. RATIO Scan 12/6 must be calibrated once a month.
- Using the spectrophotometer is the quickest, most reliable and most economical way to find the matching color.
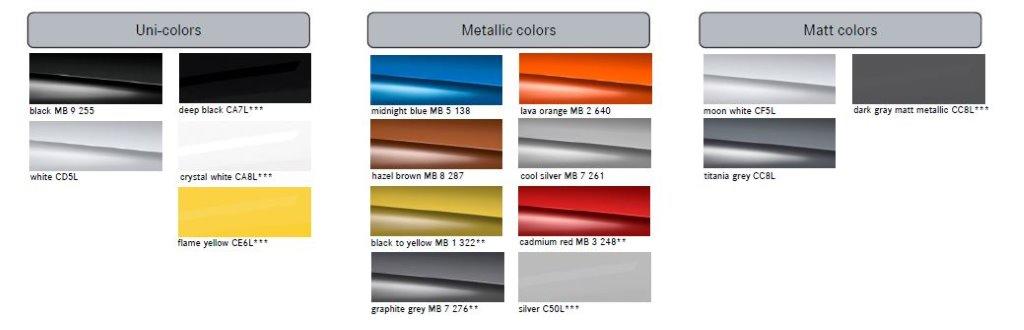
DIFFERENT COLORS ON CARS
The colors are clustered by different types of pigments and different application processes, and layer steps.
For specific colors for special systems, please refer to the appropriate module below:
- SPECIAL REFINISH PROCESSES - SILVER COLORS (90 LINE )
- "SPECIAL REFINISH PROCESSES - BLACK COLORS "
- "SPECIAL REFINISH PROCESSES - ORANGE, RED AND TEXTURED COLORS"
- "SPECIAL REFINISH PROCESSES - SILVER COLORS (55 LINE)"
- SPECIAL REFINISH PROCESSES - SYSTEM
SOLID COLORS:
All colors are created only with colored pigments. No matter what the viewing angle, the same homogenous color is produced. Solid colors can be matched with direct-gloss systems or 2-stage topcoat systems.

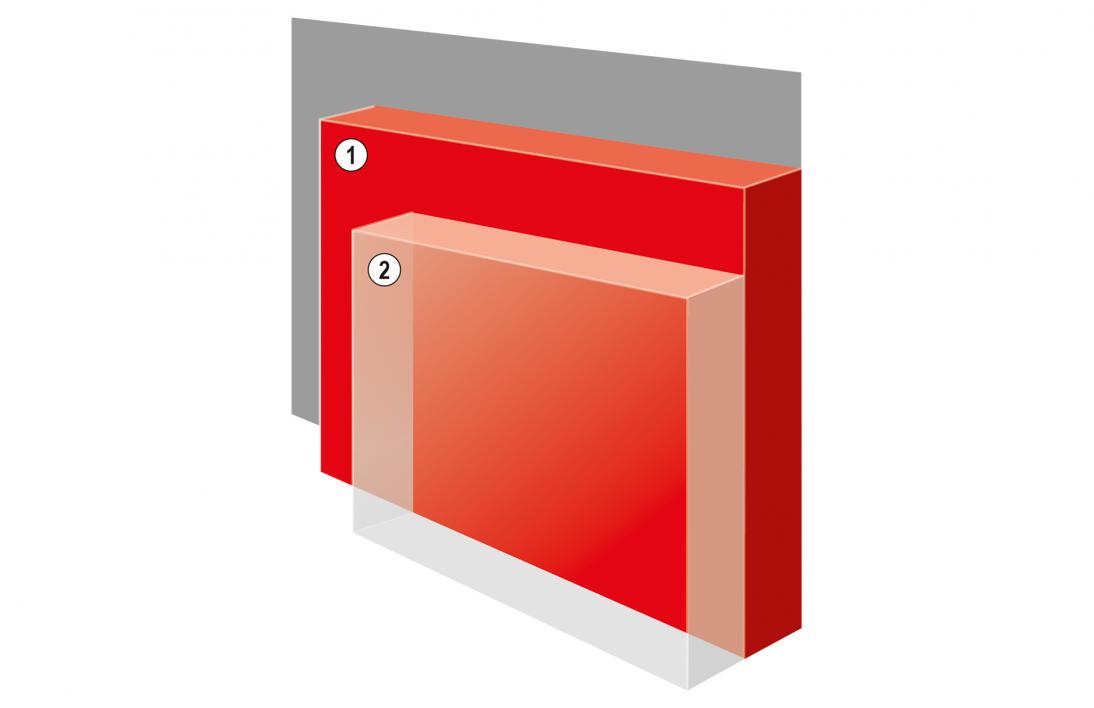
Direct gloss: 1) Direct gloss topcoat 2- stage solid topcoat: 1) solid basecoat, 2) clearcoat
METALLIC COLORS:
These colors are created not only with colored pigments, but also with aluminum effect pigments. The flakes of the aluminum effect pigments have to be correctly aligned in the basecoat layer to create a mirror effect. The color impression for these colors depends on the viewing angle. In the face view the colors are brighter compared to the side view. Most metallic colors can be matched only with 2-stage topcoat systems with a colored basecoat layer and transparent clearcoat on top.
The exception to the rule is 1-stage metallic colors, which are mainly used for industrial applications. This technology is limited to non-glossy colors and by the flop effect.
For further explanation see "Color visualization" in this module: "VIEWING ANGLE".
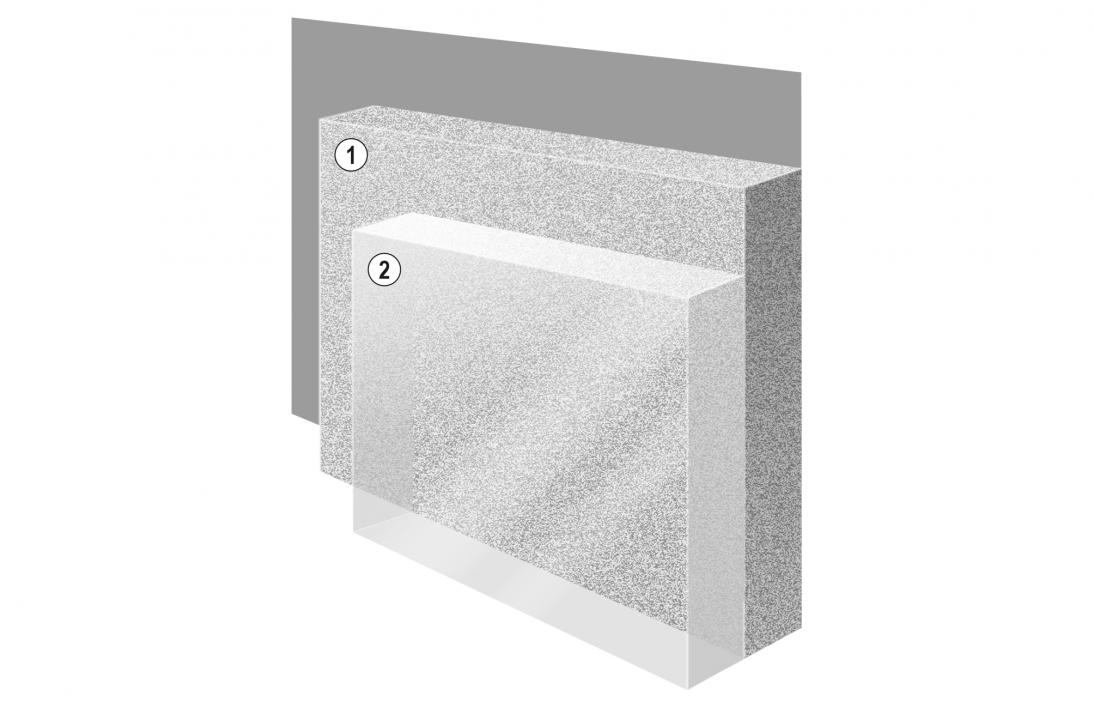
2-stage metallic: 1) Metallic Basecoat, 2) Clearcoat
PEARL-EFFECT COLOR:
Pearl-effect pigments are used in combination with colored pigments or even in combination with aluminum-effect pigments.
Most pearl-effect pigments have a glimmer in their core that is treated with transparent metal oxide on the surface. Besides the glimmer, aluminum flakes can also be used as a core material. In addition to the flop effect, these pigments can create interference colors on specific geometries. Pearl-effect colors can only be matched with 2-stage topcoat systems with a colored basecoat layer and transparent clearcoat on top.
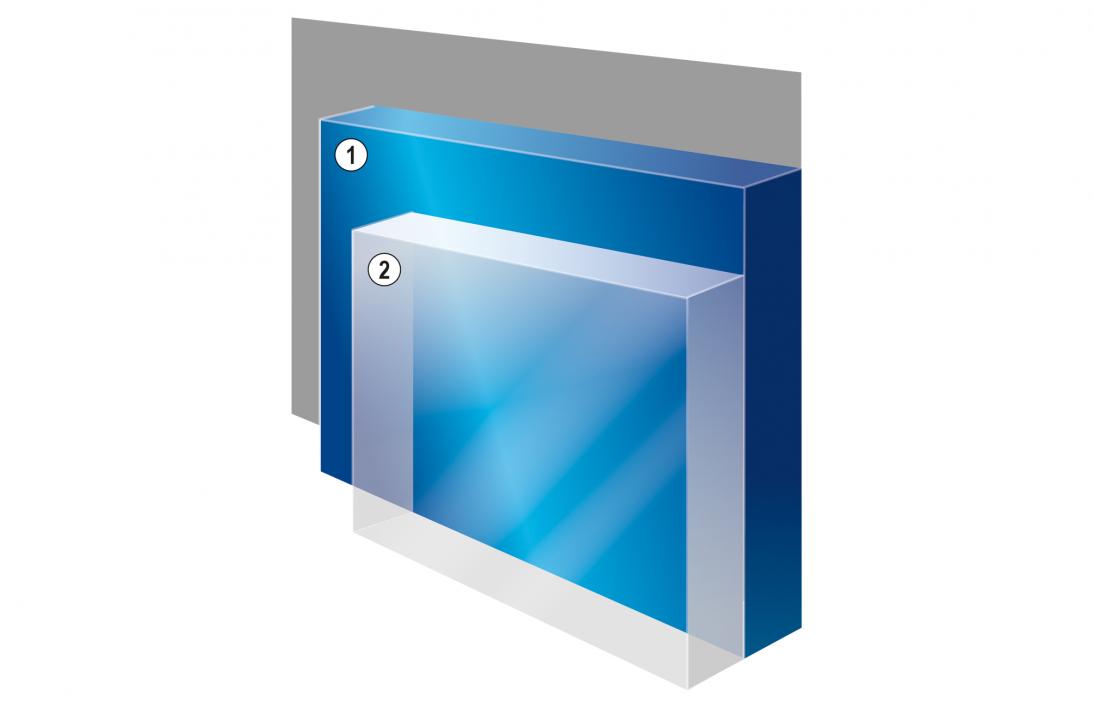
Pearl-effect color: 1) Pearl Basecoat, 2) Clearcoat
3-STAGE COLORS
Three-stage colors require two different basecoats (Step I/Step II) over each other. The first basecoat is applied for hiding. The second basecoat, formulated with pearl-effect or translucent pigments, is applied as a semitransparent layer. The third stage is the transparent clearcoat. The final color is the result of the semitransparent second basecoat affected by the first basecoat.
These colors can be matched with 3-stage topcoat systems. In addition to the formulation of the basecoats, the color is mainly affected by the applied film build of the second layer (interference colors and specialties). More coats applied in Step II will change the color and or the effect.


3-stage (solid + pearl-effect) topcoat system: 1) Solid white basecoat, 3-stage (effect + translucent) topcoat system: 1) Effect basecoat,
2) Translucent pearl effect basecoat, 3) Clearcoat 2) Translucent solid basecoat, 3) Clearcoat
4-STAGE COLORS:
These colors are created from three basecoats (Step I/Step II/Step III). The first covering basecoat (Step I) followed by two semitransparent basecoats (Step II/Step III). The first of the semitransparent basecoats (Step II) is often formulated with pearl-effect colors. The second semitransparent basecoat (Step III) is often formulated with highly transparent dispersed colored pigments. The final basecoat provides a certain purity of the color.
These colors can be matched with a 4-stage topcoat system. In addition to the formulation of the basecoats, the color is mainly influenced by the film builds of the two semitransparent basecoats (Step II/Step III).
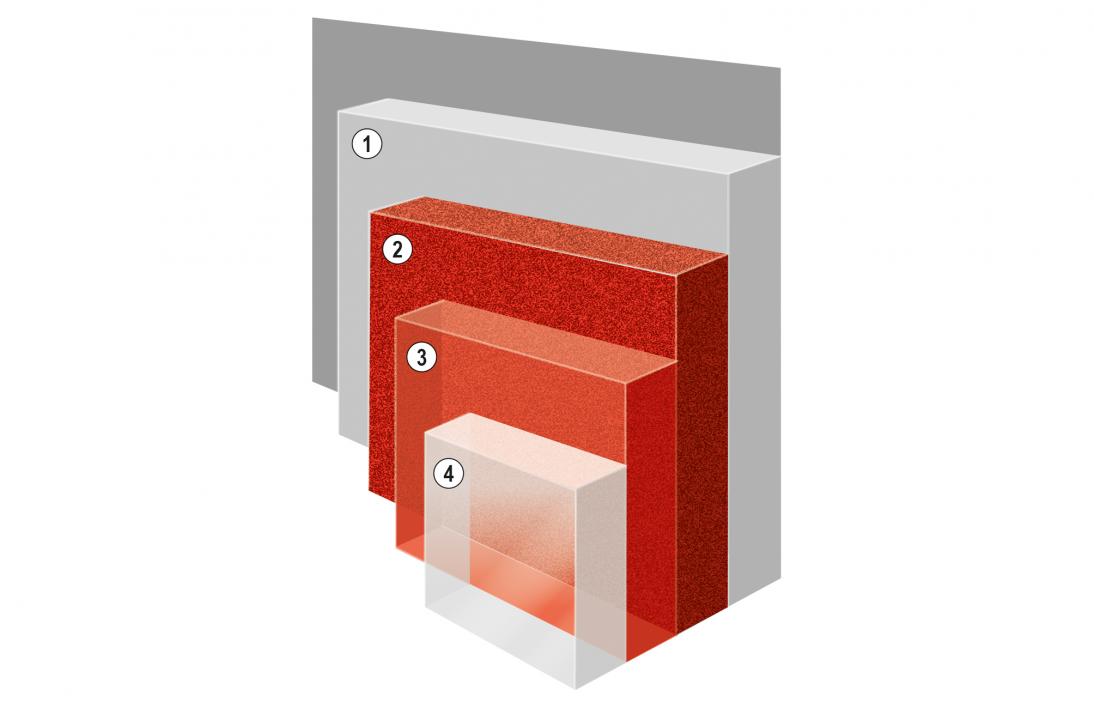
4-stage colors: 1) Grey basecoat, 2) Translucent red pearl-effect basecoat, 3) Translucent red basecoat, 4) Clearcoat
MAT AND TEXTURED COLORS:
These colors provide a reduced gloss level. This effect is created by a mat clearcoat as a final layer of 2-stage, 3-stage or 4-stage colors. For direct-gloss systems, the effect can be achieved by adding a matting agent into the direct-gloss system.
The gloss level of the system can be adjusted by the formulations, for the clearcoats by means of a mix of a semi-gloss and a mat clearcoat (Glasurit Mat Clear System). For the textured clearcoat, you can add some texture agent.
During application, the flash off times, film builds and the drying conditions can impact the final gloss level (the choice of hardener and thinner will also have an impact on the gloss).
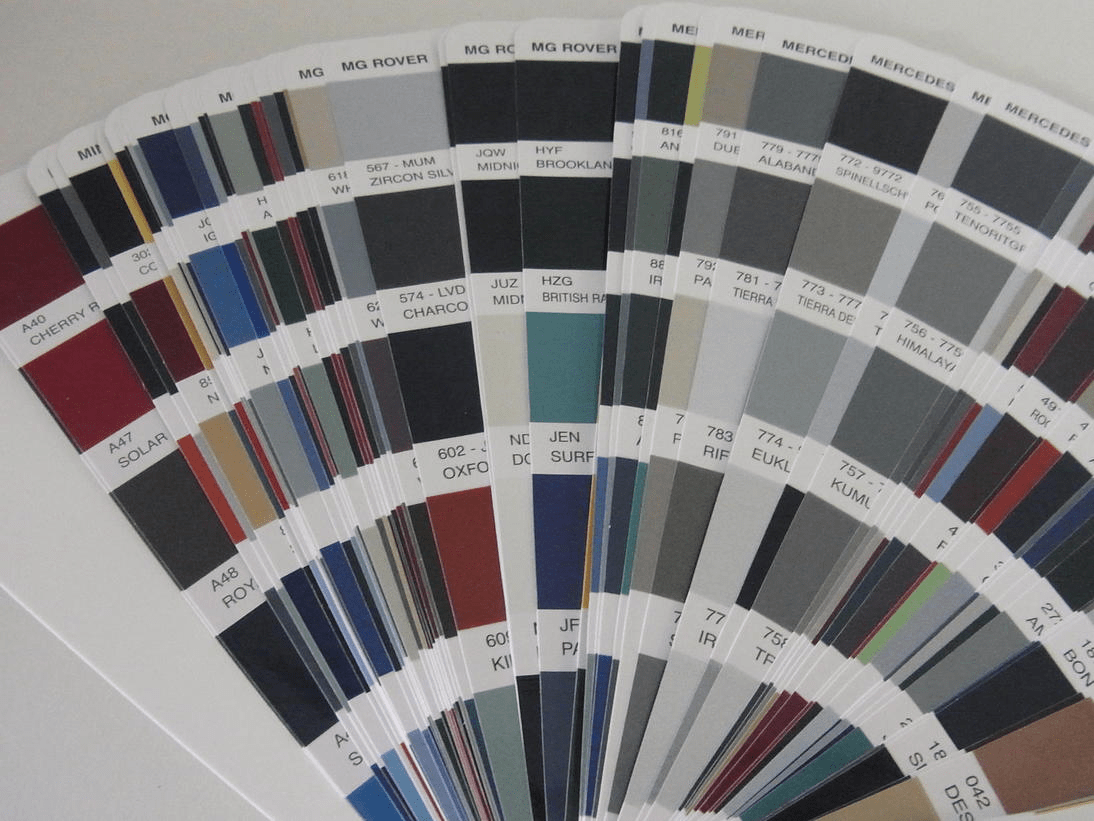
COLOR DOCUMENTATION AND COLOR TOOLS
Different options exist for color documentation and color tools:
COLOR ADJUSTMENT CHARTS
Color adjustment charts offer an overview of all mixing bases and provide information on color groups, color bias, face view and side view, as well as purity and chroma, making them a valuable aid to color adjustment.

100 Line adjustment chart
SPECTROPHOTOMETER
A spectrophotometer allows you to measure the color of a sample by measuring remission curves under different viewing angles. Advanced solutions/systems also utilize pictures to identify the texture of the effect pigments. These measurement data are compared with data from a comprehensive database in order to identify the best-matching solution and, if feasible, to even improve the mixing formula based on the measurement. Please consider that there is still a tolerance between the application of different individual painters. In such a situation, the recommended solution is suitable for a blend-in repair. If an edge-to-edge repair is selected, we recommend creating a spray-out. For 3-stage and 4-stage colors in general, we recommend creating a spray-out.

Ratio Scan II Ratio Scan 12/6
SPRAY-OUT LIBRARY
The spray-out library is the collection of spray-outs created by the individual painter. A spray-out provides the most accurate information for deciding on repair options. To fully benefit from the spray out library, the samples have to be created under real repair conditions and the individual spray-outs require detailed labelling.
For 100 Line:
COLOR RETRIEVAL RATIO SCAN 12/6
For 90 Line / 55 Line / 22 Line:
- COLOR RETRIEVAL COLOR PROFI SYSTEM CPS
- COLOR RETRIEVAL RATIO SCAN II
- COLOR RETRIEVAL RATIO SCAN 12/6
And further options for 90 Line / 55 Line / 22 Line:
PRINTED COLOR DOCUMENTATION
Example
Printed color documentation can only provide an indication of the color. It does not allow the extent to which this color can be reproduced with refinish materials to be predicted. In any case the creation of a spray-out is mandatory to decide on the repair option or correct choice of variant.
In this case you cannot use original refinish materials and pigments, as a different application technique is used. The gloss level achieved does not reflect the final gloss achieved.
ORIGINAL MATERIAL APPLIED WITH A SPREADING KNIFE
The original material is not applied by spray application, which limits the proper alignment of the effect pigments. Finally, for effect colors the displayed color is different from the color that will be sprayed on later. In any case, the creation of a spray-out is mandatory for deciding on the repair option.
COLOR TOOLS CREATED WITH REFINISH MATERIALS AND SPRAY APPLICATION
This solution allows you to display the color as it would appear later on during the repair. Please keep in mind that there is still a tolerance between the application of the tool and each individual painter. In this situation, the color tool can allows you to decide on colors for a blend-in repair. If an edge-to-edge repair is selected, we recommend creating a spray-out by the same painter. For 3-stage and 4-stage colors in general, we recommend creating a spray-out (due to application-sensitive colors, etc.).


ICCM - COLOR RETRIEVAL SOFTWARE
The color retrieval software Glasurit Profit Manager provides several functions:
- Support for identifying the color code
- Color tool chips related to the color code (for 90 Line / 55 Line / 22 Line)
- Interface for the spectrophotometer
- A mixing formula for a color code for the different paint lines
- Opportunity to print labels, e.g., for cups and spray outs
- Control of the scaling process for a mixing formula
- In the event of scaling errors, a correction mode
- Optional software that provides different reporting functions and interfaces (e.g., Body Shop Management Systems)
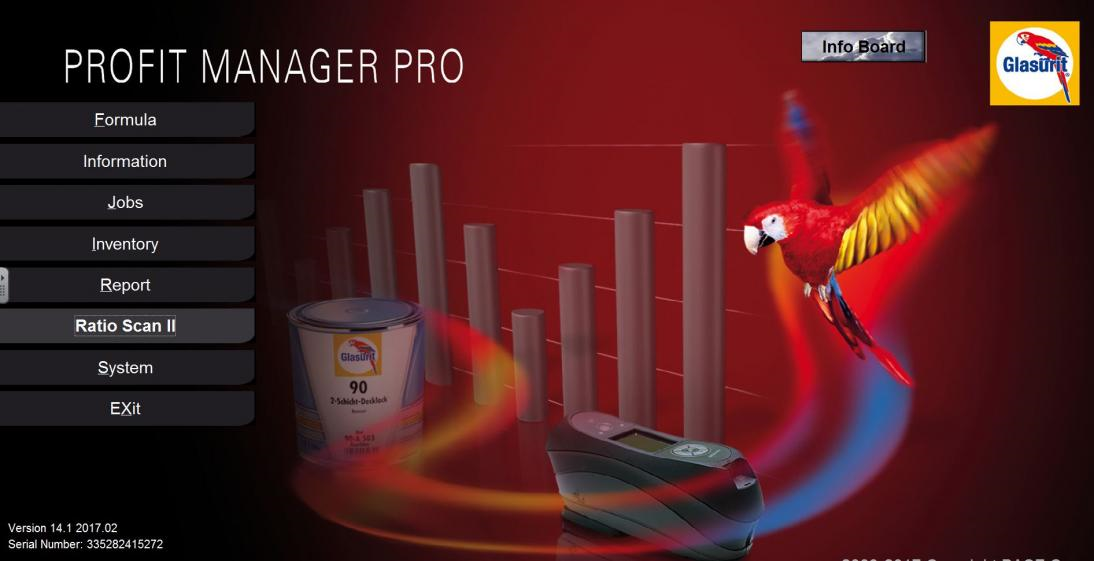
Profit Manager
COLOR VISUALIZATION
See also "Color documentation and color tools".
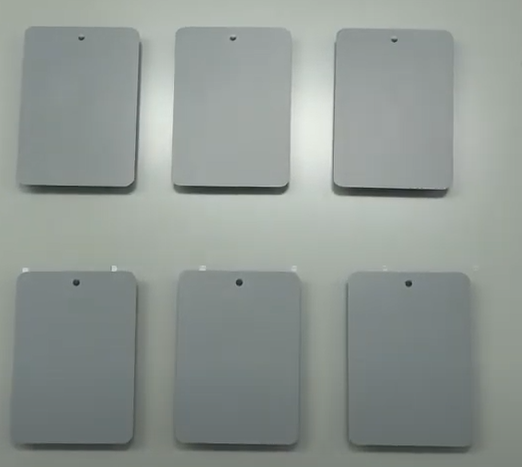
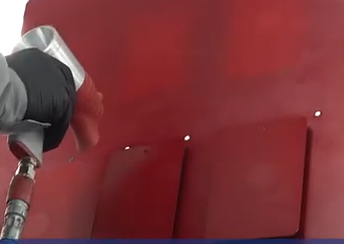
PREPARING A SPRAY-OUT
If no color tool chips are available (e.g., service formula), you have decided to perform an edge-to-edge repair, or for 3-stage or 4-stage colors, you must perform a spray-out.
To fully benefit from preparing a spray-out, we recommend that you label the spray-outs and organize them into a personal “spray-out library”. The spray-out library will enable you to visualize colors later. A properly maintained color library will reduce the number of spray-outs you will need to create.
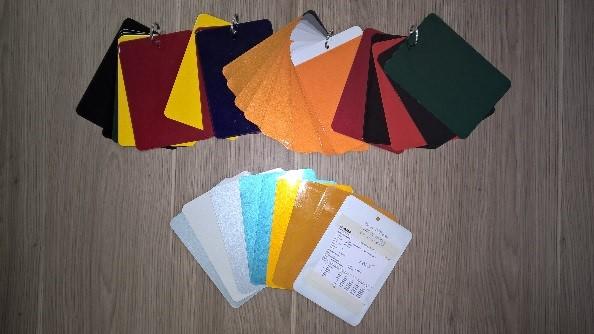
Example of a personal color library
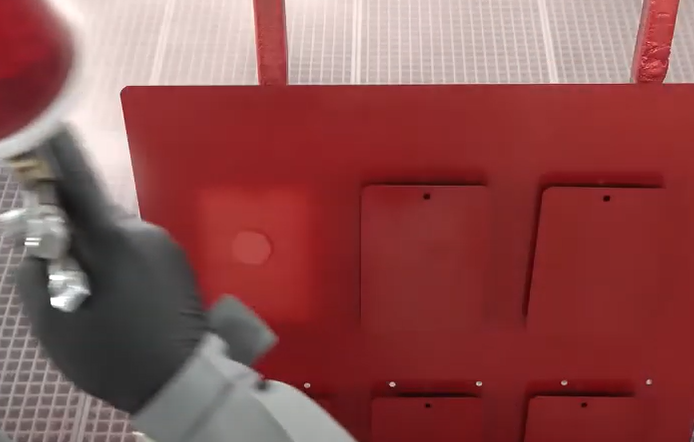
Take the following factors into consideration when preparing a spray-out:
- Type & configuration of the spraygun, to be used later for the repair
- The correct inlet air pressure (do not create a spray-out with reduced pressure)
- Correct distance between the spraygun and the spray panel
- Uniformity of the spraygun movement
- Creating a partial overlap during the application process
It is vital for you to keep these factors in mind, as they all have a great influence on the reproduction of the color. Improper application during the creation of a spray-out will lead to either an incorrect color being applied to the vehicle, or high efforts for tinting.
When producing a spray-out, you must paint the panel in exactly the same manner as you would apply the product to the vehicle. This is especially critical when reproducing 3-stage and 4-stage systems. We recommend to use the same clearcoat for the spray-out that you will apply during the repair later.
Place a label on the reverse side of the sample with the following detailed information:
Example of a label for a spray-out sample:
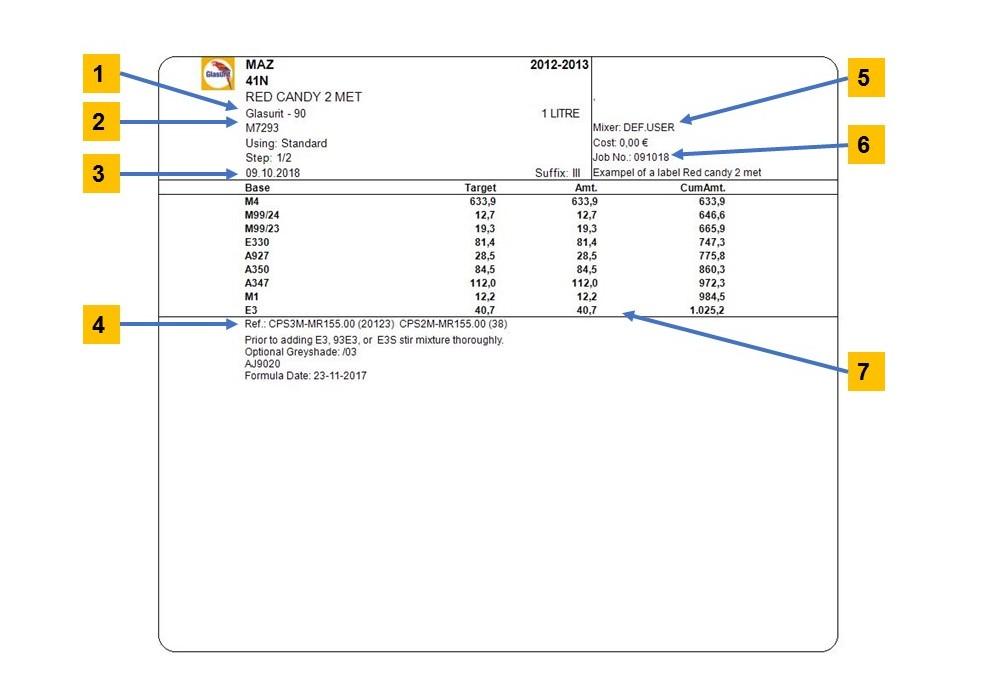
1.) Paint line, 2.) Color code, 3.) Date of creation, 4.) Color tool reference (for 90 Line / 55 Line / 22 Line), 5.) Painter, 6.) Job / customer, 7.) Mixing formula
For the 3-stage and 4-stage colors, we recommend that you prepare more than one spray-out.
PROCEDURE FOR 3-STAGE COLORS
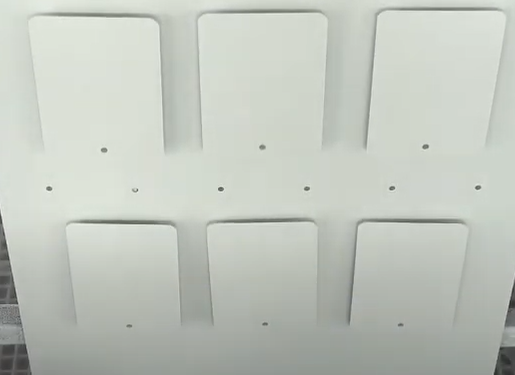
Before starting application, label the spray-out cards (numbering 1-5 from left to right, including the number of spraycoats of Step I and Step II).
100 LINE
STEP 1 100 LINE
- Apply Step I to all 5 spray-out cards with a full and a finish coat without intermediate flash off time.
- Flash off
STEP 2 100 LINE

- Apply Step II to all 5 spray-out cards with a full and a finish coat without intermediate flash off time.
- Flash off
- Remove one spray-out card
- Apply one finish coat to the four remaining spray-out cards.
- Flash off
- Remove one spray-out card
- Again, apply one finish coat of Step II to the three remaining spray-out cards.
- Flash off
- Repeat this process for all remaining spray-out cards.
STEP 3 100 LINE
![]()
- Apply and dry the clearcoat.
COLOR CHECK
- Use the spray-out cards to compare the color with the car.
- Choose the most suitable spray-out card for the vehicle.
90 LINE / 55 LINE
STEP 1 90 LINE / 55 LINE
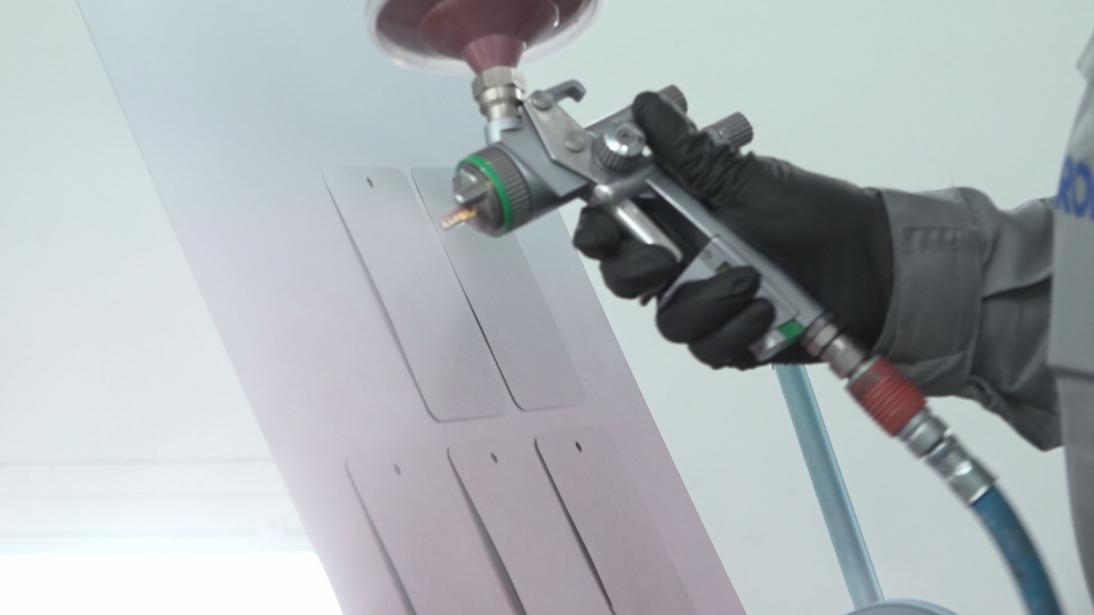
- Apply Step I to all 5 spray-out Cards.
- Flash off
- Glasurit solid colors: 2 ½ spraycoats
- Glasurit metallic colors: 2 ½ spraycoats
STEP 2 90 LINE / 55 LINE
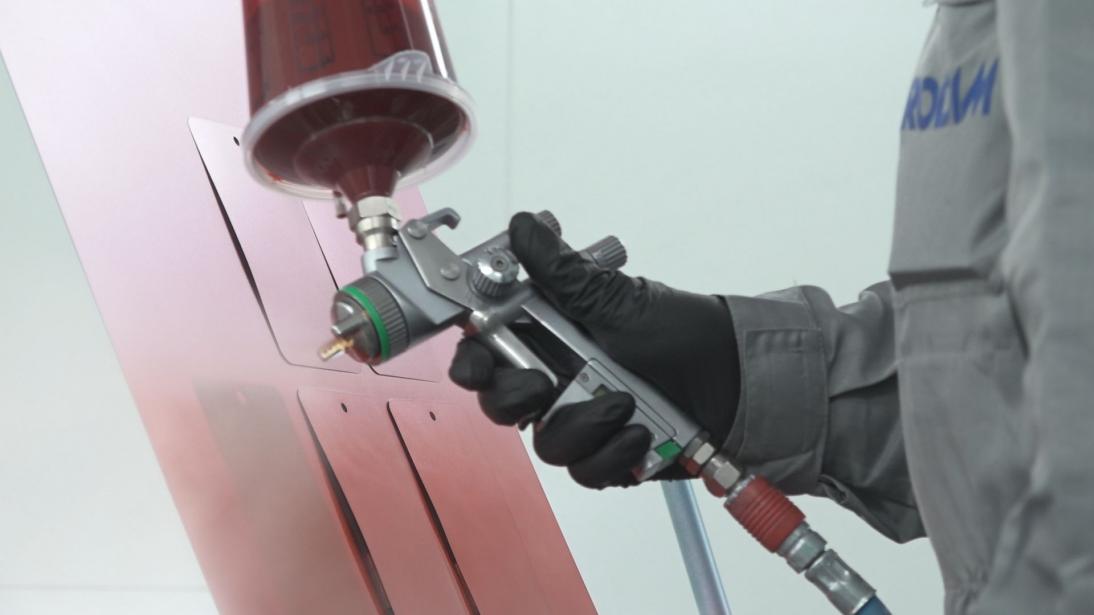
- Apply Step II
- Apply one spray-coat to the four remaining spray-out cards.
- Flash off
- Remove one spray-out card
- Again, apply one spraycoat of Step II to the three remaining spray-out cards.
- Flash off
- Repeat this process for all remaining spray-out cards.
STEP 3
![]()
- Apply and dry the clearcoat.
COLOR CHECK
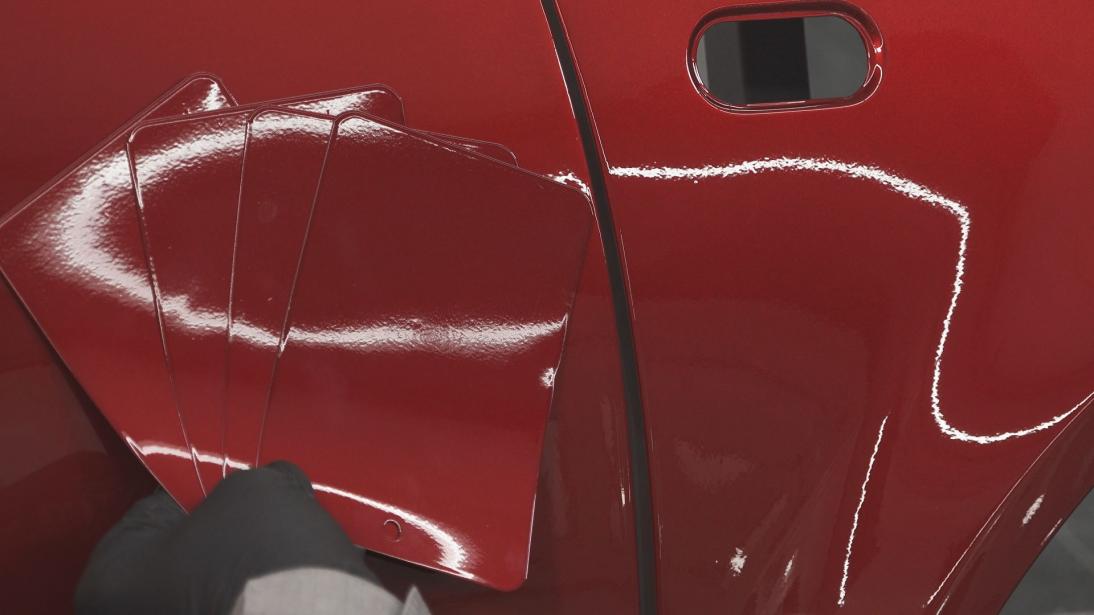
- Use the spray-out cards to compare the color with the car.
- Choose the most suitable spray-out card for the vehicle.
PROCEDURE FOR 4-STAGE COLORS
Before starting application, label the spray-out cards (numbering 1-5 from left to right, including the number of spraycoats of Step II and Step III).
100 LINE
STEP 1 100 LINE
- Apply Step I recommended greyshade on all five spray-out cards
- Flash-off
- Wherever possible, use pre-coated greyshade spray-out cards to save time and money.
STEP 2 100 LINE
- Apply Step II to all 5 spray-out cards with a full and a finish coat without intermediate flash off time.
- Flash off
STEP 3 100 LINE
- Apply Step III to all 5 spray-out cards with a full and a finish coat without intermediate flash off time.
- Flash off
- Remove one spray-out card
- Apply one finish coat to the four remaining spray-out cards.
- Flash off
- Remove one spray-out card
- Again, apply one finish coat of Step II to the three remaining spray-out cards.
- Flash off
- Repeat this process for all remaining spray-out cards.
STEP 4 100 LINE
- Apply and dry the clearcoat.
![]()
COLOR CHECK
- Use the spray-out cards to compare the color with the car.
- Choose the most suitable spray-out card for the vehicle.

90 LINE / 55 LINE
STEP 1 90 LINE / 55 LINE
- Apply Step I recommended greyshade on all five spray-out cards
- Flash-off
Wherever possible, use pre-coated greyshade spray-out cards to save time and money.
STEP 2 90 LINE / 55 LINE
- Apply Step II recommended application
- Glasurit solid colors: 2 ½ spraycoats
- Glasurit metallic colors: 2 ½ spraycoats
With intermediate flash-off time to the five spray-out cards.
- Flash-off
- Remove one spray-out card
STEP 3 90 LINE / 55 LINE
- Apply Step III to all four remaining spray-out cards.
- Flash off
- Remove one spray-out card.
- Apply one spraycoat to the three remaining spray-out cards.
- Flash-off
- Remove one spray-out card.
- Repeat this process for all remaining spray-out cards.
- Flash-off
STEP 4
- Apply and dry the clearcoat.
COLOR CHECK
- Use the four spray-out cards to compare the color with the car.
- Choose the most suitable spray-out card for the vehicle.
PANEL PREPARATION FOR COLOR COMPARISON
For color evaluation to be accurate, the surface of the sample and the car must be clean and glossy (except for mat colors). Especially for cars coming from the field, we recommend that you clean and polish the surface before performing color evaluation.
Select a surface for the color evaluation that is close to the repair area (adjacent panel) to ensure that the color of the repair matches the surrounding area.
LIGHTING CONDITIONS
Perform the color comparison in a bright and glare-free environment under daylight conditions. This could be natural daylight as well as artificial daylight (color temperature 5000 to 6500 Kelvin). Ensure that items or clothes with strong colors in the surrounding area do not impinge on the evaluation. To evaluate the texture of effect pigments, use special spotlights that will intensify the effect of the metallic and pearl-effect pigments.
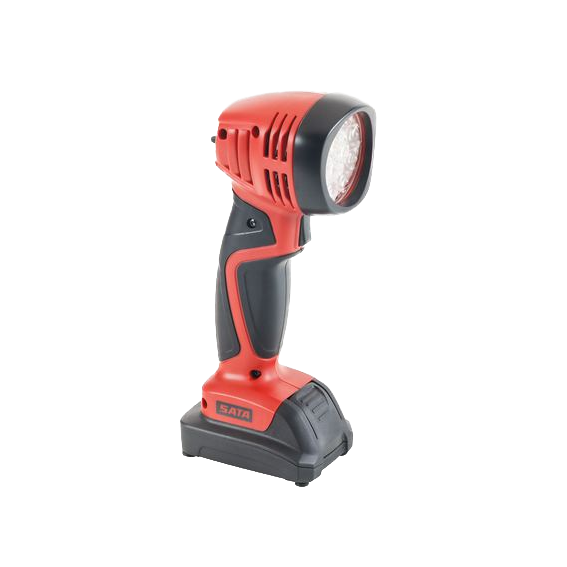
An example of a spotlight from SATA
VIEWING ANGLE
Effect pigments cause color flops depending on the viewing angle. In general, the color is brighter in the face view and darker in the side view.
A view is the angle from which you look at the painted surface.
Face view (2): - Looking at the painted substrate at 90 degrees to the substrate.
Side view (3): - Looking at the painted substrate at an angle of about 45 degrees to the Substrate.
|
Viewing Angle (Flip/flop effect) 1/ Light 2/ Face view 3/ Side view |
Color change with respect to the viewing angle |
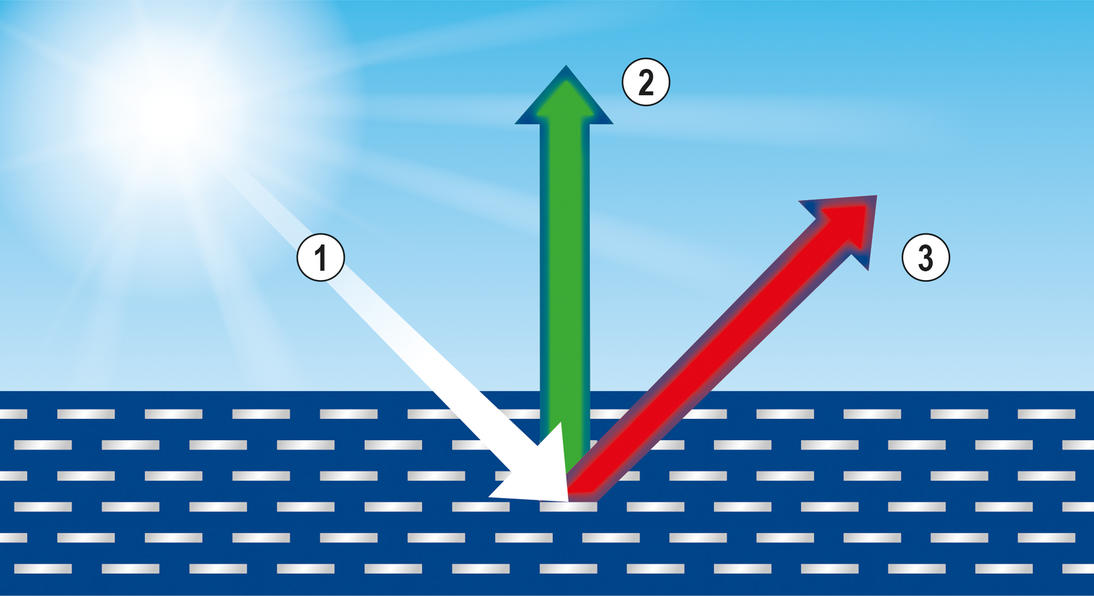
This is also relevant for color evaluation for car repair, because the three-dimensional shape of a car causes the color to be observed directly from different angles. The flop of effect colors can accentuate or smooth the contours of a car, for instance.
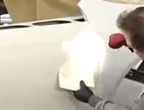
In conclusion, place the sample for the color evaluation next to the adjacent panel. Change the viewing angle during the evaluation and check if the flop of the samples follows that of the master panel.

How and where to place a sample


